Your audio system is only as good as the foundation supporting it. Vibration creeping through poorly maintained racks, dust settling into precision joints, and heat building inside enclosed shelves can quietly erode both performance and appearance over time. These aren't dramatic failures; they're slow, cumulative threats that many enthusiasts overlook while focusing all attention on the components themselves. This guide cuts through that blind spot with actionable, expert-backed steps for cleaning, protecting, and optimizing your audio furniture so it continues to serve your system at the highest level.
Table of Contents
- Essential tools and materials for audio furniture care
- Step-by-step care and cleaning for home audio furniture
- Optimizing vibration damping and isolation
- Cable management and shelf ventilation for optimal performance
- What most audiophiles misunderstand about furniture care
- Explore custom racks and solutions for next-level care
- Frequently asked questions
Key Takeaways
| Point | Details |
|---|---|
| Use proper cleaning tools | Anti-static cloths and gentle cleaners protect finishes and prevent dust buildup. |
| Prioritize vibration control | Combine mass and advanced damping materials for best results and sound performance. |
| Maintain ventilation & cable order | Open-back racks and organized cable routing keep equipment cool and interference-free. |
| Leverage isolation accessories | Isolation feet can cut vibration impact dramatically and preserve audio quality. |
| Regular care pays off | Consistent maintenance extends furniture lifespan and maximizes listening enjoyment. |
Essential tools and materials for audio furniture care
With the issue defined, let's start by gathering what you'll need for effective care and optimization. Having the right materials on hand before you begin saves time and prevents accidental damage to expensive finishes or precision woodwork.
The foundation of any care kit is straightforward. Here's what every audiophile should keep within reach:
- Microfiber cloths (lint-free, multiple sizes for surfaces and tight corners)
- Anti-static brushes for removing dust from ventilation areas without generating static charge
- Non-abrasive wood cleaner formulated for natural hardwoods like walnut, oak, or cherry
- Beeswax or natural wood conditioner to protect and nourish solid wood shelving
- Isolation feet, pucks, or cones for vibration decoupling beneath components
- Cable ties and velcro organizers to route signal and power cables cleanly
- Small ventilation fans or passive cooling aids for enclosed shelf positions
Choosing materials that match your rack's construction matters enormously. A solid walnut or cherry rack has different needs than a rack with MDF shelving or metal frames. Natural hardwood benefits from periodic conditioning, while metal frames may need occasional rust prevention treatment on hardware. You can browse audio furniture examples to better understand the material variety available and what care each requires.
The table below summarizes common care tools and their primary purpose:
| Tool / Material | Primary Purpose | Recommended Frequency |
|---|---|---|
| Microfiber cloth | Surface dusting and polishing | Weekly |
| Anti-static brush | Clearing ventilation slots and joints | Monthly |
| Natural wood conditioner | Nourishing and protecting hardwood finish | Every 3-6 months |
| Isolation feet / pucks | Vibration decoupling beneath components | Inspect every 6 months |
| Cable organizers | Signal separation and clutter reduction | As needed, review quarterly |
| Non-abrasive cleaner | Removing grime from surfaces | Monthly or as needed |
One often-cited but underappreciated point: open-back racks are preferred for ventilation, particularly with tube amplifiers, and proper cable management meaningfully reduces both clutter and electromagnetic interference. For more practical audio furniture tips, exploring care guides specific to your rack material is a worthwhile starting point.
Step-by-step care and cleaning for home audio furniture
Now that you know what you need, here's how to apply those tools for thorough cleaning and maintenance. Consistency is the single most important factor here. Sporadic deep cleans cannot compensate for months of accumulated dust and neglect.
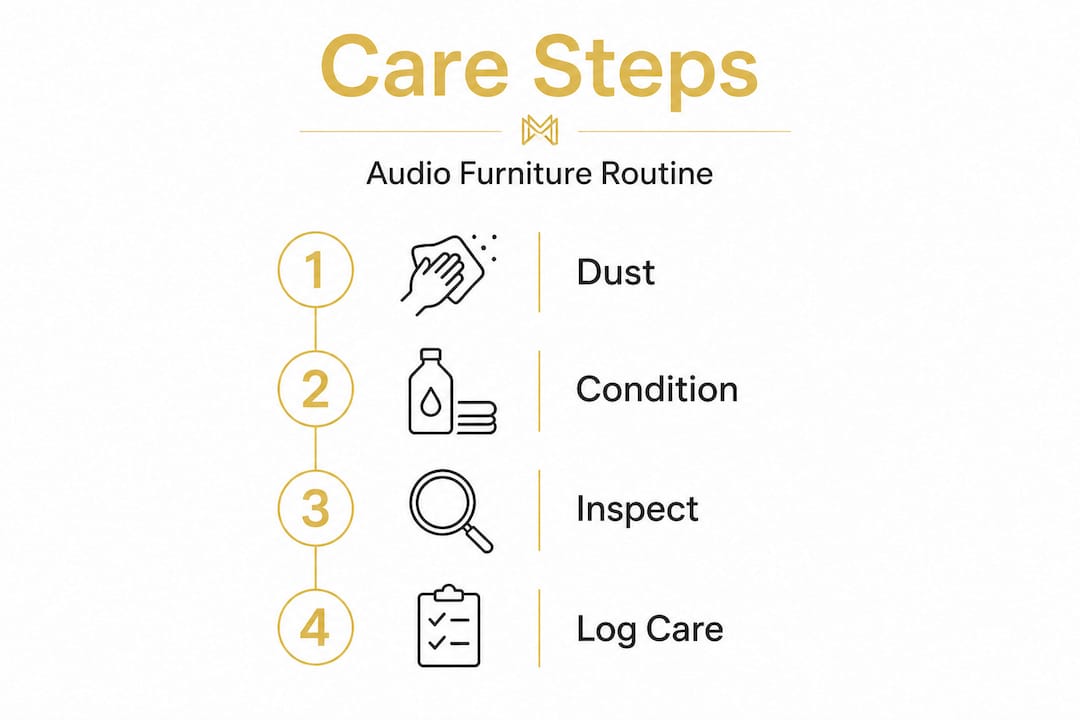
Monthly surface care routine:
- Power down all components before cleaning. Static and moisture near live equipment create real risk.
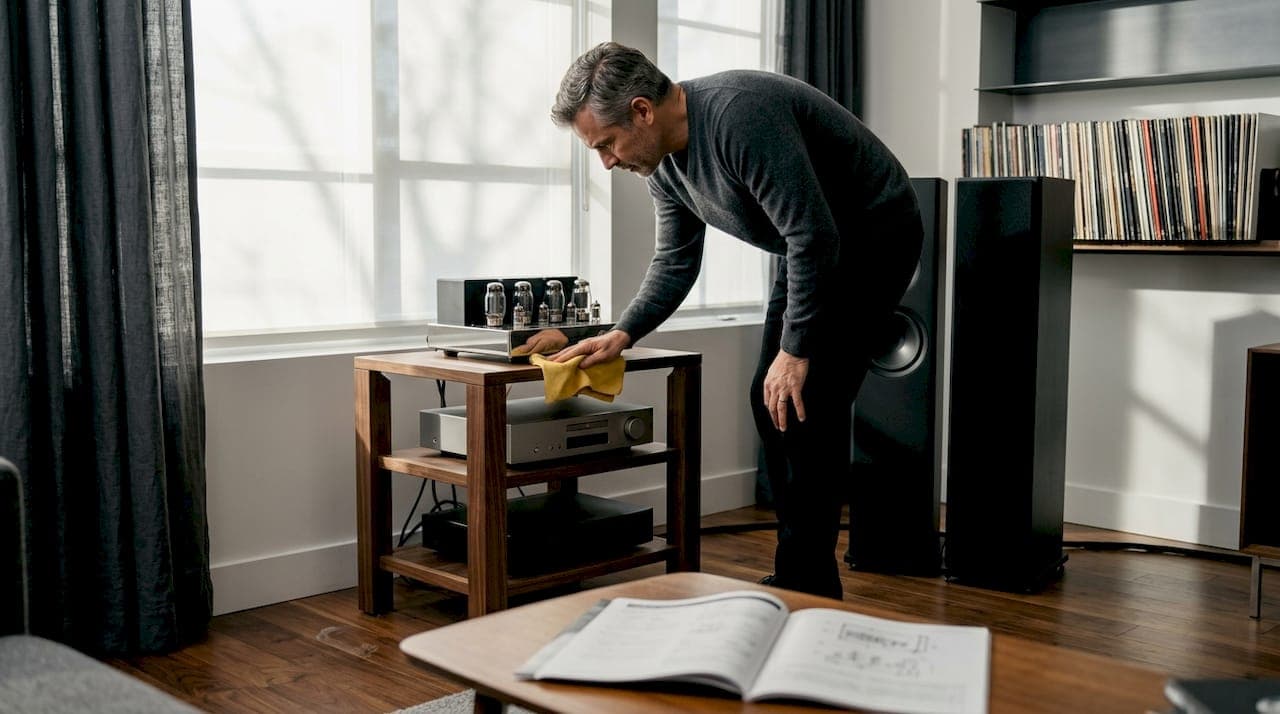
- Dry-dust all surfaces with a microfiber cloth, moving from top shelves to bottom so dislodged particles fall onto un-cleaned surfaces below.
- Use an anti-static brush along joints, ventilation slots, and the underside of shelves where dust concentrates invisibly.
- Apply a small amount of natural wood cleaner to a cloth (never directly to the wood) and wipe in the direction of the grain. Avoid saturating any area.
- Inspect all joints and fasteners for looseness. Solid wood racks expand and contract with seasonal humidity changes, and a loose joint can become a vibration source.
- Check isolation feet and pucks for signs of compression set (visible flattening), which reduces their effectiveness.
- Reorganize any cables that have shifted, ensuring power and signal cables remain separated wherever possible.
Every 3-6 months: deep conditioning and protection
Apply a quality beeswax or natural oil conditioner to hardwood surfaces, working it in gently and buffing off any excess. This prevents drying, cracking, and surface checking (small splits that develop in overly dry wood). For racks assembled with the guidance found in resources like this audio rack assembly steps guide, revisiting hardware torque specifications during the deep clean is smart practice.
Products to avoid absolutely: Silicone-based polishes coat the wood surface and prevent it from breathing. Ammonia or alcohol-based cleaners strip natural oils and dull fine finishes. Rough cloths or paper towels create micro-scratches that accumulate into visible wear over time.
Pro Tip: Keep a small notebook or digital note logging each cleaning session. Record any observations like new vibration sounds, loose joints, or changes in finish appearance. Patterns detected early are far easier and cheaper to address than problems that compound over months.
Optimizing vibration damping and isolation
Effective cleaning is just the start; optimizing vibration control is key to performance and longevity. This is the area where small investments produce disproportionately large sonic returns, and where the physics of audio furniture become genuinely interesting.
Vibration enters your system from multiple pathways simultaneously. Subwoofers couple energy directly into the floor. External movement, such as foot traffic or nearby HVAC systems, travels through structural elements. Bass-heavy playback creates acoustic pressure that physically moves components. Every one of these pathways can degrade the delicate signal-level voltages inside your electronics.
Mass damping vs. constrained layer damping
These two approaches operate on different principles. Mass damping relies on sheer weight to resist movement. Heavy mass absorbs some vibrations but specialized constrained layer damping (CLD) materials go further, converting vibrational energy directly into heat through internal friction between bonded layers. In practice, the most effective racks combine both: a heavy structural mass with CLD shelving that dissipates residual energy before it reaches your components.
| Method | How it works | Effectiveness | Best application |
|---|---|---|---|
| Mass loading | Resists movement via inertia | Moderate | Floor-coupled racks |
| Constrained layer damping | Converts vibration to heat | High | Shelf construction |
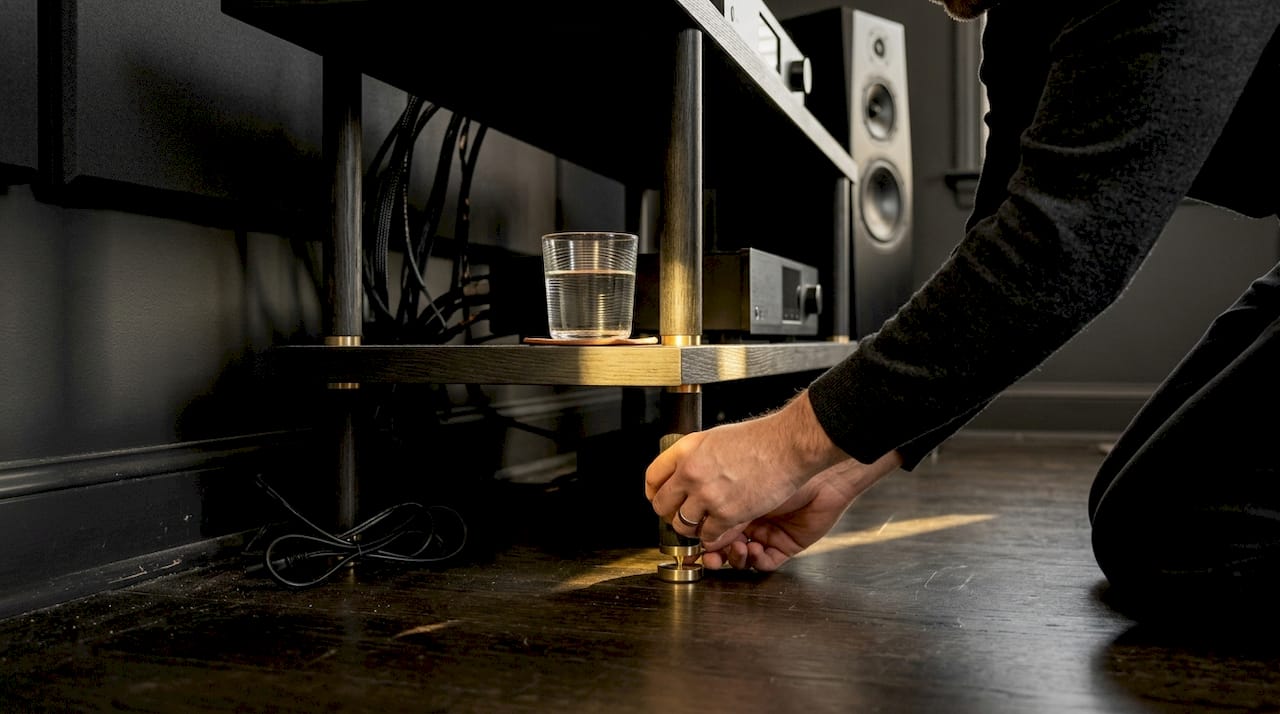
| Isolation feet / cones | Decouples rack from floor | Very high | Rack-to-floor interface |
| Component-level feet | Decouples component from shelf | High | Individual equipment |
| Combined approach | Layers all methods | Highest | High-vibration environments |
The numbers on isolation components are striking.
by 30-40 dB in controlled testing. To put that in perspective, a 30 dB reduction represents a 1,000-fold reduction in vibrational power reaching your components. That is not a subtle refinement; it is a fundamental change in the environment your electronics operate within.For rooms with significant vibration challenges, such as spaces with wooden floors over a basement or rooms adjacent to HVAC equipment, combining rack-level isolation with component-level feet is the most effective strategy. The rack's isolation feet handle gross floor-coupled energy, while individual component feet manage the finer shelf-surface vibrations that pass through the rack structure itself.
The solid wood racks guide explains how specific hardwood species contribute their own natural damping characteristics, while our acoustic isolation tips resource covers layering strategies in greater detail.
Pro Tip: Place a glass of water on each shelf while music plays at moderate volume. If you see ripples, you have measurable vibration reaching that surface. Use this simple test before and after adding isolation components to verify real-world improvement.
Cable management and shelf ventilation for optimal performance
Alongside vibration management, proper airflow and neat cabling are critical for both sound quality and safety. These two factors are closely related, and neglecting either introduces problems that are easy to avoid with minimal effort.
Why ventilation matters more than most people realize
Heat is the most reliable predictor of component failure in audio electronics. Tube amplifiers in particular generate substantial heat and require unobstructed airflow above, below, and beside them. Enclosed or partially enclosed shelves trap this heat, creating operating temperatures well above component design specifications. The result is degraded performance in the short term and shortened component lifespan over years of use.
"Open-back racks are preferred for ventilation, especially with tube amps; cable management reduces clutter and interference." — Are Equipment Racks a Beneficial Part of Your Audiophile System?
Signs that ventilation is inadequate in your setup include:
- Components running noticeably hot to the touch after moderate listening sessions
- Unexplained hum or noise that appears after extended use and disappears when the system cools
- Intermittent performance degradation during long listening sessions
- Visible heat marks or discoloration on shelf surfaces beneath power amplifiers
Cable management strategies that protect sound quality
Signal cables and power cables generate different types of electromagnetic fields. When they run parallel and in close contact, power cables can induce noise into signal cables through electromagnetic induction, which audibly increases the noise floor of your system. Separating them by at least 6 inches where possible, and crossing them at 90-degree angles when separation isn't feasible, dramatically reduces this interference.
Practical steps for cleaner cable routing:
- Label every cable before rerouting so you can identify connections without tracing runs
- Use velcro ties rather than rigid zip ties, which can pinch cables and damage shielding over time
- Route power cables down one side of the rack and signal cables down the other
- Leave service loops (gentle extra length) at each component connection so future adjustments don't require complete disassembly
- Secure cables away from ventilation paths so they don't block airflow between shelves
Visiting our acoustic isolation benefits page provides additional context on how rack design supports both airflow and signal integrity through thoughtful structural choices.
What most audiophiles misunderstand about furniture care
Here is an observation we've built through years of working with serious listeners: the majority of audiophiles invest extraordinary care in their electronics and source material but treat their furniture as a passive backdrop. This is a fundamental misunderstanding of where performance actually lives.
Consider what actually sits between your electronics and your listening chair. It isn't air. It's wood, metal, and the physical structure of your rack. Every resonance, every vibration pathway, every thermal environment your components experience is shaped by that furniture. Neglecting it is equivalent to buying exceptional tires and never checking their pressure.
The counterintuitive truth we've observed repeatedly is that small refinements in furniture care often produce more audibly noticeable improvements than expensive cable upgrades. Replacing degraded isolation feet, conditioning dried-out hardwood shelves to restore their natural damping properties, or simply routing cables properly costs very little and changes what you actually hear in meaningful ways.
Many enthusiasts also hold a mistaken belief that heavier always means better for vibration control. Mass alone does resist movement, but without a mechanism for dissipating energy, it can also store and slowly release vibration in ways that are harder to predict. Combining rack-level mass with constrained layer damping and component-level isolation produces results that neither approach achieves independently. This layered strategy is exactly why the benefits of wood racks go beyond aesthetics. Hardwoods like walnut and cherry have fiber structures that scatter and absorb vibrational energy in ways that engineered materials simply don't replicate.
Dust and heat are the invisible maintenance failures we see most often. Both accumulate slowly enough to escape notice until the damage is done. A consistent weekly dusting and a quarterly ventilation check are genuinely protective acts, not just housekeeping.
Explore custom racks and solutions for next-level care
If you're ready to raise your system's performance and longevity, discover tailored solutions to match your care philosophy.
Everything described in this guide works best when your rack is designed to support it from the outset. Open-back structures, hardwood shelving with natural damping properties, precision-fitted isolation points, and thoughtful cable routing space aren't afterthoughts in well-designed audio furniture. They're built in.
We build racks and stands with exactly these principles at their core, using responsibly sourced hardwoods and traditional joinery refined over four generations of woodworking. Whether you're starting fresh or upgrading an existing setup, browsing our shop hi-fi racks collection gives you a clear sense of what purpose-built audio furniture looks and performs like. Explore the Myro racks and stands range for handcrafted options that support every care and isolation strategy covered here, or visit our audio furniture gallery for inspiration that connects aesthetics with acoustic performance.
Frequently asked questions
How often should I clean audio furniture to maximize performance?
Wipe surfaces with a dry microfiber cloth weekly to prevent dust accumulation, and perform deep conditioning and structural inspection every 3-6 months, adjusting frequency upward in particularly dusty or dry environments.
What is the role of damping in audio furniture care?
Damping minimizes the vibrational energy that reaches your components, protecting electronics from mechanical stress and improving sound quality by preventing resonances from coloring the signal. Specialized damping materials convert this energy into heat more effectively than mass alone.
Why are open-back racks recommended for tube amplifiers?
Tube amplifiers generate significant heat that must dissipate freely to prevent thermal throttling and component degradation. Open-back racks allow unrestricted airflow around sensitive components, maintaining safe operating temperatures during extended listening sessions.
Can isolation feet really reduce vibration impacts?
Absolutely. Isolation feet and pucks have demonstrated 30-40 dB of vibration attenuation in controlled testing, representing a reduction in vibrational power by a factor of 1,000 or more at the component-to-shelf interface.